How to Safely Remove Press-On Nails
MY NAIL GIFT / NAIL GUIDES
Take your time and let the adhesive release. The illustrated instructions below separate tab removal from glue removal so you can follow the right method.
Your illustrated guide
Take your time and use the removal method for your adhesive. Tabs and nail glue loosen differently. Never pull a press-on straight off or force an edge that is still attached.
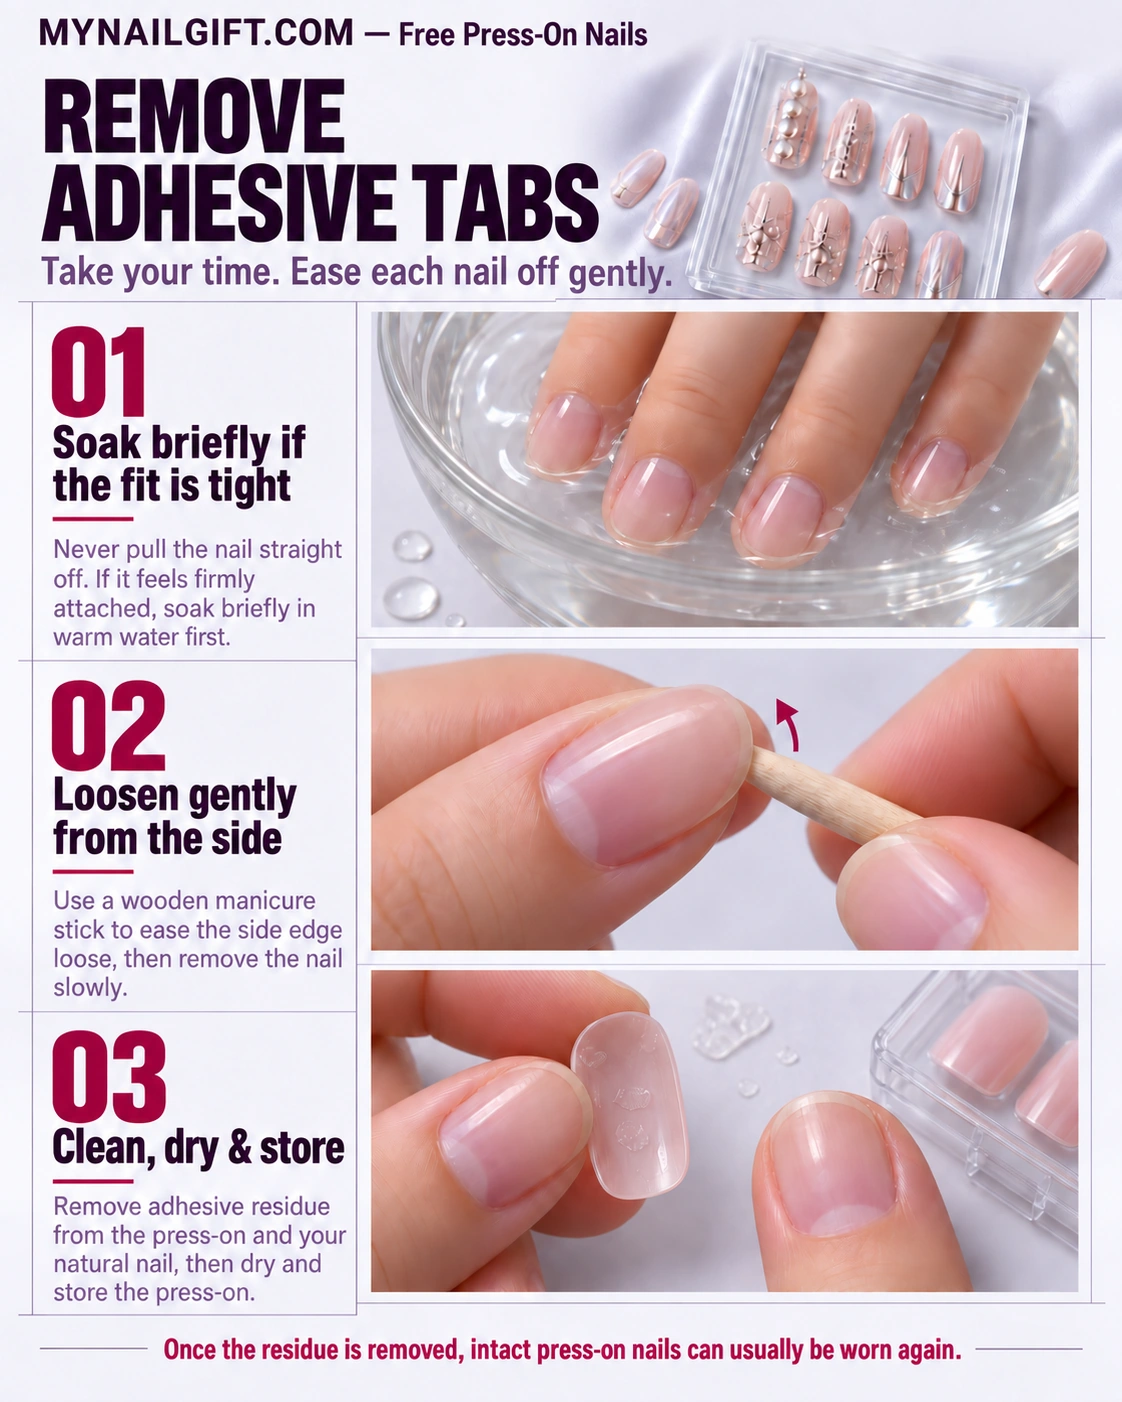
Remove adhesive tabs gently
- Soften the fit if it feels tight. If the nail remains firmly attached, soak briefly in warm water first.
- Loosen from the side. Use a wooden manicure stick to gently ease a side edge loose, then remove the nail slowly. Do not pull it straight off.
- Clean, dry and store. Remove adhesive residue from the press-on and natural nail, then dry and store the press-on.
Once residue is removed, intact press-on nails can usually be worn again.
Remove nail glue patiently
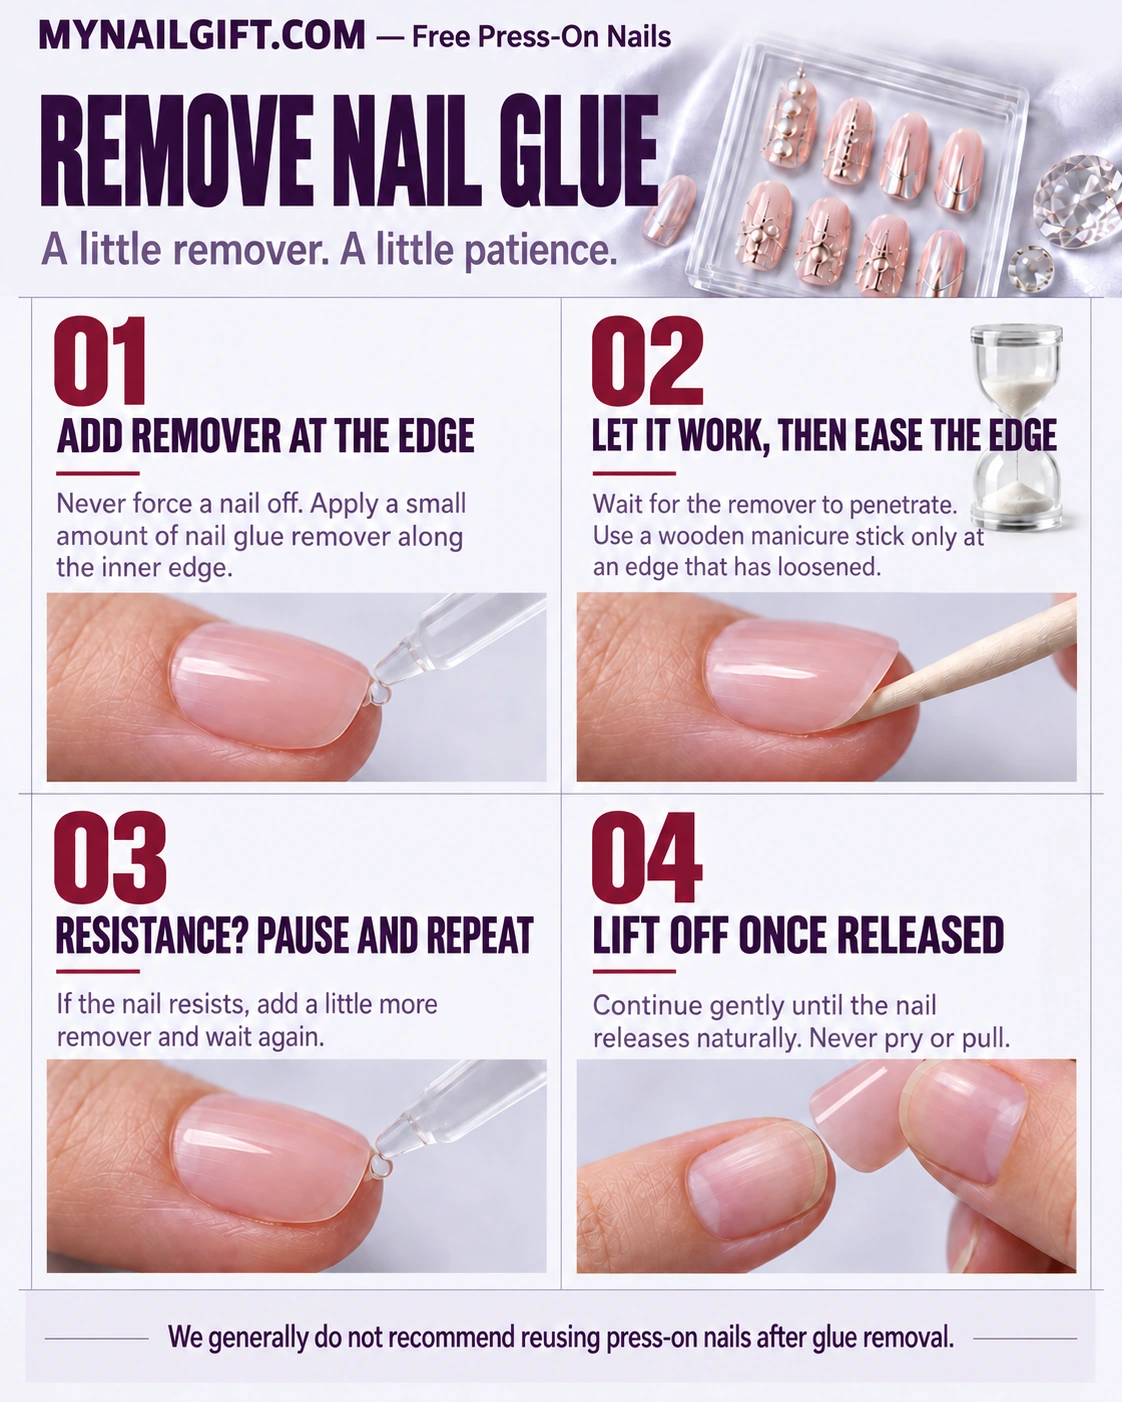
- Add suitable remover at the edge. Apply a small amount of nail-glue remover along the inner edge, following the remover’s instructions. Never force the nail off.
- Let it work. Wait for the remover to penetrate. Use a wooden manicure stick only at an edge that has loosened.
- Pause if there is resistance. Add a little more remover and wait again rather than pulling.
- Lift only when released. Continue gently until the nail releases naturally. Never pry or pull.
The shared guide generally recommends against reusing press-on nails after glue removal.